Setting up stands for indoor or outdoor events can be a challenge if you are not well prepared. However, with proper planning and the right techniques, you can set them up easily and quickly. This guide will help you understand how to prepare, assemble, and manage your stands effectively. Whether you are setting up for a trade show, a product launch, or a local fair, this blog will show you the steps to follow for a smooth setup.
Understanding the Basics of Indoor and Outdoor Stands
What Are Indoor Stands?
Indoor or outdoor stands are display structures used in indoor spaces like exhibition halls, malls, or conference rooms. These stands are usually designed to be lightweight, compact, and easy to assemble. They do not need weather protection, so the materials are usually less rugged.
What Are Outdoor Stands?
Outdoor stands are used for open-air events such as festivals, sports events, or promotional campaigns in public areas. These stands need to be strong enough to handle wind, rain, and sun. They are usually made from weatherproof materials and often come with additional features like canopies or weighted bases.
Why the Setup Process Matters
A fast and smooth setup saves time, reduces stress, and allows your team to focus more on customer interaction and event success. Efficient stand setup also reduces the chance of damage to equipment and improves brand presentation.
Step-by-Step Guide to Set Up Indoor Stands Quickly
Step 1: Plan Ahead
Before the event day, review the venue map, check dimensions, and decide on the ideal location for your stand. Create a checklist of all the materials you need, such as banners, tables, lighting, product displays, and brochures.
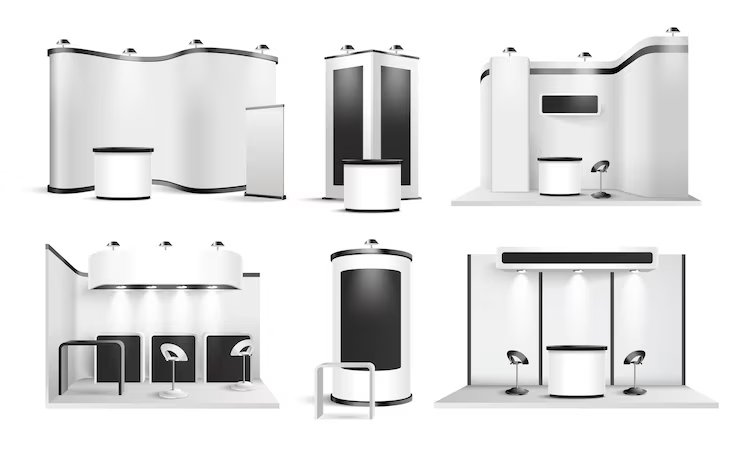
Step 2: Choose a Modular Stand Design
Modular stands are quick to assemble and dismantle. These stands come in pre-built panels or parts that fit together easily. Choose a design that doesn’t need special tools or expertise.
Step 3: Pack Items in Order of Assembly
Organize your stand parts in the order you will need them during setup. Label the boxes clearly. Keep tools, fasteners, and instructions at the top or in a separate, easy-to-access kit.
Step 4: Arrive Early
Arriving early gives you extra time to handle unexpected problems. You can also claim the best spot and avoid last-minute rush.
Step 5: Follow a Clear Setup Process
Start with the frame, then add panels, shelves, and lighting. End with branding elements like posters and product displays. If you’re working with a team, assign roles to make the process faster.
How to Set Up Outdoor Stands Efficiently
Step 1: Check the Weather Forecast
Outdoor setups must consider weather. Check the forecast ahead of time and carry waterproof covers, tie-downs, and weights just in case.
Step 2: Use Weather-Resistant Materials
Use stands made of aluminum, stainless steel, or high-quality plastic. Avoid cardboard or thin cloth that can get damaged easily. Use UV-printed banners to keep colors bright under sunlight.
Step 3: Choose a Quick Pop-Up Structure
Pop-up tents or gazebos are great for outdoor events. They open and lock into place in minutes. Some also come with side panels and anchor points for extra support.
Step 4: Anchor Everything Securely
Outdoor stands must be secured to prevent tipping or flying away. Use sandbags, water weights, or metal stakes to anchor your structure. Check each point to ensure it is tight and stable.
Step 5: Do a Quick Test Run Before the Event
Practice setting up your outdoor stand before the event. This helps you find issues early and ensures you have all the right tools and parts.
Common Tools and Items to Keep Handy
- Allen keys
- Screwdrivers
- Zip ties
- Tape (duct and double-sided)
- Extra banners or signs
- Portable battery or power bank
- Extension cords
- Scissors or cutters
These basic tools can solve many setup issues quickly. Keep them in a small toolbox or bag for easy carrying.
Tips to Make Setup Even Faster
Use Graphics That Snap or Clip On
Choose graphics and banners that use Velcro, magnets, or clips. These options are faster than screws or bolts.
Color Code or Label Stand Parts
Label all parts using color stickers or letters. This will help you assemble the stand faster without guessing which piece goes where.
Invest in a Setup Manual With Pictures
Create or print a visual setup guide with simple steps and pictures. Anyone can follow it, even if they are doing it for the first time.
Train Your Team Before the Event
If more than one person is involved in setup, make sure everyone understands their role. A short training or practice session can make a big difference on event day.
Benefits of a Quick and Easy Setup
More Time for Final Touches
A quick setup allows you to spend more time fine-tuning your display, adjusting lighting, or organizing brochures.
Less Physical Stress
Setting up large stands can be tiring. A fast and smooth process reduces the time spent lifting and adjusting heavy parts.
Better First Impression
Being ready before the crowd arrives makes your brand look professional. It helps you welcome guests with confidence.
Mistakes to Avoid During Setup
Not Testing the Stand Before the Event
Always do a test run at your office or warehouse to make sure everything fits and works as expected.
Forgetting Spare Parts
Carry extra screws, bolts, and clips. One missing part can delay the whole setup.
Using Complex Designs for Short Events
Avoid heavy or complex structures if the event lasts only a few hours. Use light, simple stands that are easy to move.
Ignoring Venue Rules
Some venues have rules about setup time, electricity use, or safety. Check the guidelines in advance to avoid last-minute surprises.
Conclusion: Make Stand Setup Simple and Fast
Setting up indoor and outdoor stands doesn’t have to be hard or slow. With a bit of planning, the right tools, and a smart process, you can make setup quick and stress-free. Whether you’re displaying at a trade show, a public event, or a product launch, the right setup will help you focus on what really matters: connecting with your audience.
For more insightful articles related to this topic, feel free to visit penwhatmatters