Plastering is an essential part of home maintenance, ensuring walls and ceilings remain smooth, durable, and aesthetically appealing. Whether you are dealing with minor cracks, peeling plaster, or a complete re-plastering job, achieving a smooth and flawless finish requires the right techniques, tools, and materials. If done correctly, plastering repair work can enhance the look of your home and prevent long-term damage.
In this comprehensive guide, we will explore the essential steps, expert tips, and best practices to help you achieve a seamless plaster finish.
Understanding Plastering Repair Work
Before starting any plastering repair work, it’s important to assess the extent of the damage. Different types of plaster damage require different approaches, so understanding the problem is the first step in achieving a professional result.
Common Plaster Problems That Require Repair
- Cracks – These can appear due to structural movement, temperature changes, or poor-quality application.
- Peeling or Flaking – Often caused by poor adhesion, excessive moisture, or using low-quality materials.
- Damp or Water Damage – Discoloration, mold growth, and soft patches indicate moisture issues.
- Holes and Dents – Damage from furniture, nails, or impact can leave visible imperfections.
- Bubbling or Blistering – Caused by trapped moisture or poor bonding between the layers of plaster.
- Uneven or Rough Surfaces – Can be the result of improper application or poor finishing techniques.
Once you identify the issue, you can determine the appropriate method to fix it and restore your walls or ceilings to their original condition.
Essential Tools and Materials for Plastering Repair
To achieve a smooth, flawless finish, you need the right tools and materials. Here’s what you’ll need:
Tools
- Plastering trowel
- Plastering hawk
- Mixing bucket
- Sandpaper (medium to fine grit)
- Plastering float
- Putty knife or scraper
- Paintbrush (for applying bonding agents)
- Drill with a mixing attachment (for mixing plaster)
Materials
- Plaster mix (ready-mixed or powder form)
- PVA bonding agent (for better adhesion)
- Joint compound (for minor repairs)
- Fiberglass mesh tape (for reinforcing cracks)
- Water (for mixing)
- Primer or sealant (for finishing)
Having the right tools and materials ensures efficiency and better results when repairing plaster damage.
Step-by-Step Guide to Achieve a Smooth Plaster Finish
Step 1: Prepare the Surface
Proper preparation is crucial for achieving a flawless finish. Start by removing loose or damaged plaster using a scraper or putty knife. Clean the surface thoroughly to remove dust, debris, and grease.
For cracks and holes:
- Use a vacuum or a dry brush to remove any loose particles.
- Apply a PVA bonding agent to improve adhesion.
- For deeper cracks, reinforce with fiberglass mesh tape before applying plaster.
For damp or water-damaged areas:
- Identify and fix the source of moisture before starting repairs.
- Allow the affected area to dry completely.
- Apply a mold-resistant primer to prevent future issues.
Step 2: Mix the Plaster Properly
A well-mixed plaster ensures smooth application and reduces the chances of cracking. Follow these tips when mixing plaster:
- Use clean water and a clean mixing bucket.
- Slowly add plaster powder to the water while stirring continuously.
- Use a drill with a mixing paddle for a consistent, lump-free mixture.
- Let the mix rest for a few minutes before applying.
- The ideal plaster consistency should be thick but spreadable.
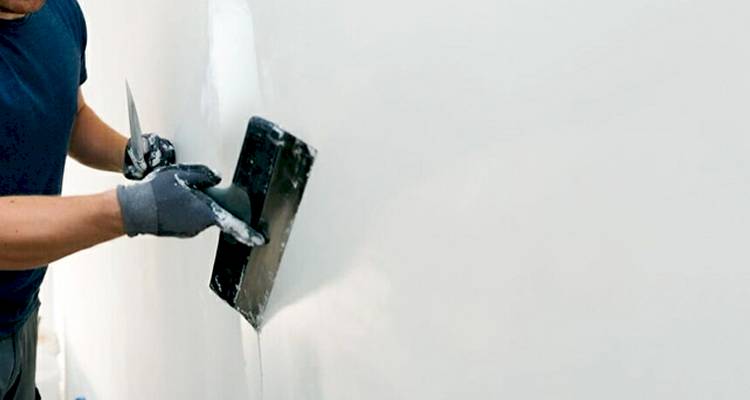
Step 3: Apply the First Coat of Plaster
Once the surface is prepared and the plaster is mixed, you can start applying the first coat.
- Load a small amount of plaster onto the hawk.
- Use a plastering trowel to spread the plaster evenly over the surface.
- Apply the plaster in thin, even layers, starting from the bottom and working upwards.
- Use firm, consistent strokes to prevent lumps and air pockets.
- Allow the first coat to dry partially before applying a second coat.
Step 4: Apply a Second Coat for a Smoother Finish
A second coat of plaster ensures a polished, professional appearance.
- Lightly mist the first coat with water to improve adhesion.
- Apply a thinner layer of plaster using smooth, sweeping motions.
- Focus on blending edges and feathering out the plaster to create a seamless transition.
- Allow the second coat to dry fully before proceeding to the finishing stage.
Step 5: Sanding and Smoothing
Once the plaster has dried, sanding helps achieve a flawless finish.
- Use medium-grit sandpaper to smooth out rough patches and imperfections.
- Follow with fine-grit sandpaper for a polished look.
- Be careful not to over-sand, as this can create uneven areas.
- Wipe the surface with a damp cloth to remove dust before painting.
Step 6: Priming and Painting
To protect the repaired plaster and ensure a uniform finish, apply a primer before painting.
- Use a high-quality primer to seal the surface and enhance paint adhesion.
- Once the primer is dry, apply paint using a roller or brush.
- Apply at least two coats of paint for a consistent, long-lasting finish.
Expert Tips for a Professional-Looking Plaster Finish
- Work Quickly: Plaster dries fast, so work efficiently to avoid drying inconsistencies.
- Keep Tools Clean: Regularly clean your trowel and mixing tools to prevent lumps and uneven application.
- Use the Right Pressure: Apply even pressure when spreading plaster to prevent ridges and streaks.
- Avoid Overworking the Plaster: Excessive troweling can cause drag marks and uneven surfaces.
- Maintain Proper Ventilation: Good airflow helps the plaster dry evenly and prevents moisture buildup.
When to Call a Professional Plasterer
While minor repairs can be a DIY task, some plastering issues require professional expertise.
- Large-scale damage or deep cracks that indicate structural issues.
- Extensive water damage that requires moisture treatment before re-plastering.
- Ornamental or decorative plastering that needs specialized skills.
- Time-sensitive projects where expert efficiency is needed.
Hiring a professional ensures high-quality results and saves time on complex plastering repair work.
Conclusion
Achieving a smooth, flawless finish with plastering repair work requires patience, the right tools, and proper techniques. By following these steps—from surface preparation to final finishing—you can restore damaged walls and enhance the overall appearance of your home.
Whether you’re fixing minor cracks or undertaking a full-scale plaster repair, careful application and attention to detail will ensure long-lasting, professional results. If the damage is extensive, don’t hesitate to seek professional help to guarantee the best outcome for your walls and ceilings.