If you’re an adventure lover looking for a challenging, high-altitude Himalayan trek, the Bali Pass Trek should be at the top of your list. Situated in the Uttarkashi district of Uttarakhand, India, this trek takes you through some of the most stunning and remote landscapes, including dense forests, alpine meadows, ancient villages, a mesmerizing glacial lake, and a thrilling summit climb at 16,207 feet.
This trek isn’t for the faint-hearted. It tests your physical stamina and mental resilience with steep ascents, rugged terrains, unpredictable weather, and long trekking hours. However, the reward is unmatched—breathtaking views of Swargarohini, Bandarpoonch, Kalanag, and the Yamunotri Valley, along with the immense satisfaction of completing one of India’s toughest treks.
I’ve put together this detailed, day-wise itinerary based on my own experience to help you prepare for this once-in-a-lifetime adventure. Let’s dive in!
1. Introduction: Why I Chose the Bali Pass Trek?
For someone who has always loved trekking in the Himalayas, the Bali Pass Trek was an obvious choice. Having completed a few moderate treks like Hampta Pass and Kedarkantha, I was looking for something more challenging and rewarding. After reading about Bali Pass, I was immediately drawn to its diverse landscapes and remote nature. Unlike commercial treks, this one is less crowded, more raw, and full of adventure.
The best part of the trek is the combination of ancient Himalayan villages, dense pine forests, serene lakes, and high-altitude summits. You start the trek in the lush greenery of Govind Wildlife Sanctuary, move through Ruinsara Valley, experience the tranquility of Ruinsara Tal, and then conquer the thrilling Bali Pass summit. It’s a complete journey, both physically and spiritually.
However, I was well aware that this trek is not easy. It requires excellent fitness, endurance, and mental toughness. The altitude gain is rapid, and some sections are technical, requiring ropes and steep climbs on ice and loose scree. But the challenge was what made it exciting, and I knew I had to experience it firsthand.
2. Day 1: Arrival in Dehradun and Drive to Sankri
The Journey to Sankri – The Gateway to Adventure
The trek officially begins at Sankri, a small, scenic village located at 6,400 feet. However, before reaching Sankri, I had to get to Dehradun, the capital of Uttarakhand. Dehradun is well-connected by trains, buses, and flights, making it a common starting point for many Himalayan treks.
From Dehradun, I joined my trekking group, and we set off on a long but scenic 8-10 hour drive to Sankri. The journey itself was an adventure—we passed through charming hill towns like Mussoorie, Purola, and Mori, all offering breathtaking views of lush valleys, dense forests, and the Tons River flowing alongside the road.
Exploring Sankri: A Trekker’s Paradise
As we reached Sankri, I was immediately drawn to its charm. The village is known as a trekking hub, bustling with trekkers preparing for Har Ki Dun, Kedarkantha, and Bali Pass treks. The wooden houses, small shops selling trekking gear, and friendly locals made it feel warm and welcoming.
I checked into a cozy homestay and explored the local market, where I tried some delicious Aloo Paratha and Pahadi Rajma Chawal. As night fell, the temperature dropped, and the excitement for the next day’s trek kept me awake.
3. Day 2: Trek from Sankri to Seema via Taluka
Drive to Taluka – The Last Motorable Point
Early in the morning, we took a short drive (12 km) from Sankri to Taluka, which is the last motorable point before the trek begins. Taluka is a tiny village with traditional wooden houses and basic facilities. From here, the real adventure began.
Trekking Through Enchanting Forests and Bridges
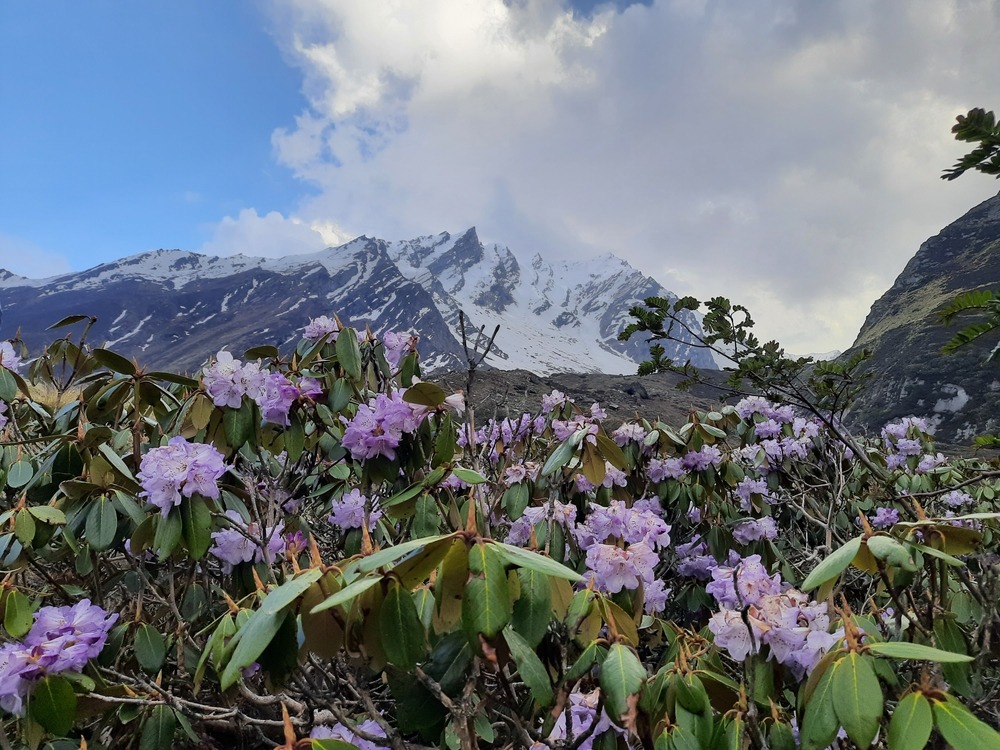
The trek from Taluka to Seema (14 km) was a beautiful and refreshing experience. The trail passed through dense forests of pine, deodar, and rhododendrons, with occasional wooden bridges and gushing streams crossing our path. The melodious chirping of Himalayan birds and the sound of the Tons River flowing alongside created a serene trekking experience.
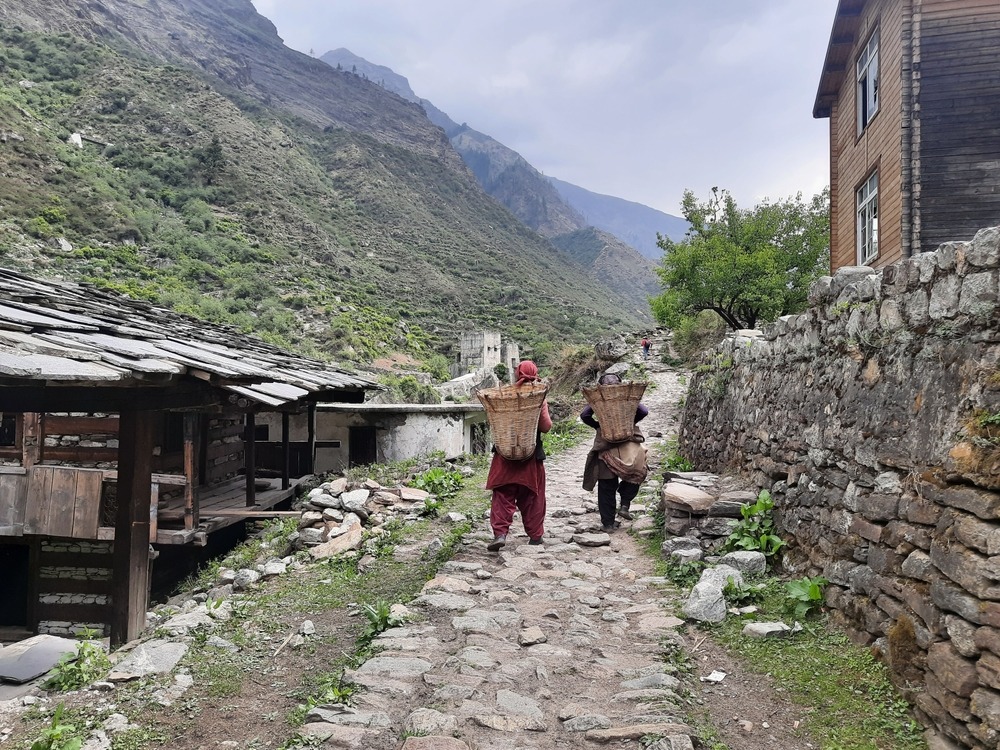
I also encountered local villagers, mostly shepherds and farmers, wearing traditional Pahadi attire and carrying loads of firewood. Their simplicity and connection to nature were truly inspiring.
Reaching Seema – A Peaceful Campsite
After hours of trekking, I finally arrived at Seema, a small camping spot with basic dhabas and shelters. The best part of the evening was sitting by the river, listening to the water flow under the moonlight, and enjoying a warm meal prepared by our trek crew.
4. Day 3: Seema to Rainbasera – The Real Adventure Begins
A Challenging Terrain with Breathtaking Views
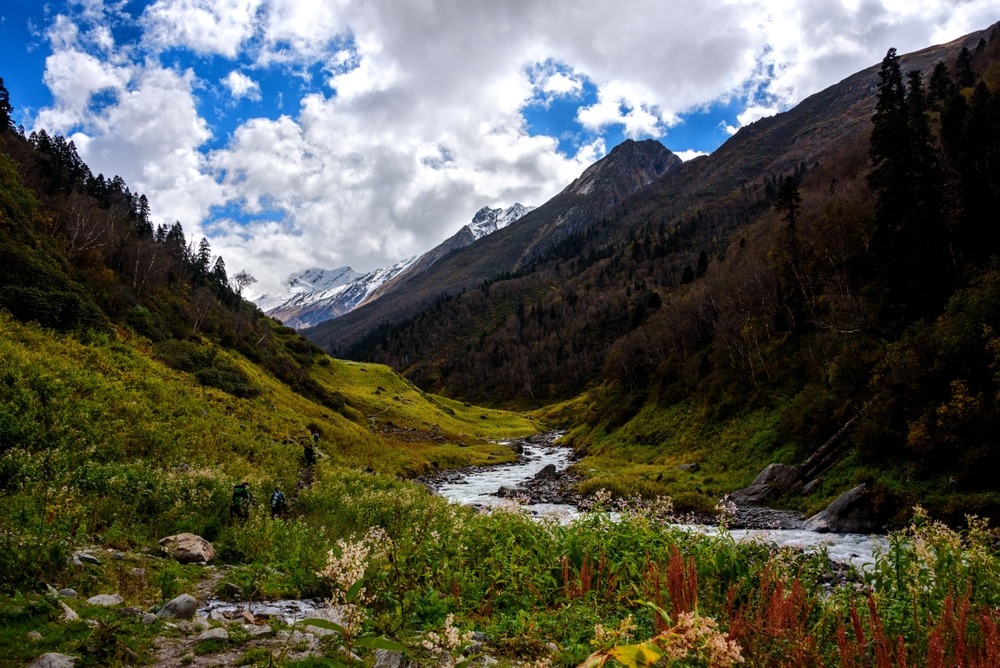
The trek from Seema to Rainbasera (9 km) took me deeper into the wilderness. The landscapes changed drastically—villages disappeared, the forests thinned out, and towering mountains dominated the skyline. The trail became rocky, uneven, and steep, making it physically demanding.
This was also the day I started noticing the altitude gain. The air felt thinner, and every step required more effort and endurance. I kept myself hydrated and took small breaks to adjust to the new altitude.
Camping in Isolation – A Night Under the Stars
When we reached Rainbasera, it felt like stepping into complete isolation. There were no villages, no mobile networks—just us and nature. The Ruinsara River flowed beside our campsite, creating a soothing background melody.
That night, as I lay in my tent, I peeked outside and saw the Milky Way spread across the sky. It was one of those rare moments of silence and peace, where I felt completely disconnected from the world and connected to nature.
If you’re planning to embark on the Bali Pass Trek and want a safe, well-organized, and hassle-free experience, I highly recommend trekking with The Searching Souls. With their experienced guides, well-planned itineraries, and excellent support services, they ensure that your journey is both thrilling and comfortable.
5. Day 4: Rainbasera to Ruinsara Tal – A Mesmerizing Glacial Lake
A Journey to One of the Most Beautiful High-Altitude Lakes
Waking up in Rainbasera was an experience in itself—the crisp morning air, the sound of the Ruinsara River gushing nearby, and the golden hue of the Himalayan sunrise painted the landscape in breathtaking colors. After a hearty breakfast, we packed up and began our 7 km trek to Ruinsara Tal, a high-altitude glacial lake that I had been eagerly waiting to see.
The trail from Rainbasera to Ruinsara Tal was steeper than expected, with several rocky sections requiring careful footing. However, the scenic beauty made the effort worthwhile. As I ascended, the lush greenery slowly faded, replaced by barren, rocky terrain and snow patches. The contrast between green meadows, crystal-clear streams, and towering snow-covered peaks created a surreal view.
Reaching Ruinsara Tal – A Hidden Himalayan Paradise
As I approached Ruinsara Tal (11,811 feet), my excitement peaked. And then, suddenly, there it was—a pristine lake with turquoise-blue waters, surrounded by some of the most majestic peaks of the Himalayas. The stillness of the water reflected the surrounding Swargarohini, Black Peak, and Bandarpoonch ranges, creating an image so perfect it felt unreal.
This lake is not only breathtakingly beautiful but also sacred. Local folklore ties it to the Mahabharata, and it is believed that the Pandavas passed through this valley on their journey to Swargarohini. Spending the night beside this mystical lake was an incredible experience, as the cold winds howled through the valley and the sky lit up with countless stars.
6. Day 5: Ruinsara Tal to Odari – The Final Preparation
Gaining Altitude and Facing Harsh Weather
The next day, we began our 6 km trek to Odari, a rocky campsite that would be our final resting point before the Bali Pass summit climb. The landscape changed dramatically—the lush beauty of Ruinsara Tal gave way to barren, rugged mountains, and the oxygen levels started dropping.
Odari means “cave”, and legend has it that Hanuman rested in this cave while searching for the Sanjeevani herb. The terrain was tough—steep ascents, loose gravel, and thin air made every step harder. By now, the altitude had started affecting some trekkers, causing mild headaches and fatigue. Staying hydrated and taking slow, measured steps was crucial.
Camping at Odari – A Test of Mental Strength
As the evening set in, the temperature dropped drastically. At 13,800 feet, the night was freezing, and strong winds howled through the valley. Despite wearing multiple layers, the cold was intense, making it difficult to sleep. However, the excitement for the next day—the summit climb to Bali Pass—kept my spirits high.
The trek leader gathered us for a final briefing, explaining the challenges we’d face while climbing Bali Pass. We packed our gear, set our alarms for a pre-dawn start, and tried to get as much rest as possible.
7. Day 6: Odari to Bali Pass Summit and Descend to Lower Dhamni
The Summit Push – Climbing to 16,207 Feet
This was the most demanding yet rewarding day of the entire trek. We woke up at 2 AM, had a quick breakfast, and geared up for the steep climb to Bali Pass. The trek started under the moonlight, with the icy winds cutting through our layers.
The first few hours involved navigating through rocky moraines and loose scree, requiring extreme caution. As we gained altitude, the terrain became snow-covered, making the ascent even more challenging. Using trekking poles and microspikes, we carefully made our way up.
The final stretch to the pass was the toughest part—it was a near-vertical climb on ice and snow, demanding every ounce of energy I had left. But as soon as I reached the summit at 16,207 feet, exhaustion turned into pure euphoria.
The View from Bali Pass – A Moment of Triumph
Standing at the top of Bali Pass, I was greeted with an unreal 360-degree view of towering Himalayan peaks—Swargarohini, Bandarpoonch, Kalanag, and the Yamunotri Valley stretched out before me. The sense of accomplishment was overwhelming. The air was thin, but the feeling of standing at such a high altitude, surrounded by snow-covered peaks, was indescribable.
After soaking in the views, we began the steep descent to Lower Dhamni. This was another challenging part—slippery slopes, rocky terrain, and a rapid loss of altitude made the descent as tough as the ascent. By the time we reached Lower Dhamni, our legs were exhausted, but the hardest part was over.
8. Day 7: Lower Dhamni to Janki Chatti and Drive to Dehradun
Descending to the Final Stretch
The 7 km descent to Janki Chatti felt easier compared to the previous days, but my body was still recovering from the intense summit day. The landscape changed once again—snowy slopes were replaced by green meadows and dense forests, signaling that we were leaving the high-altitude region behind.
I took my time, enjoying the last glimpses of the mighty Himalayas and reflecting on the entire journey. It felt surreal that just a few days ago, I was trekking through remote valleys, crossing rivers, and summiting one of the most challenging passes.
Relaxing in Yamunotri Hot Springs
Once I reached Janki Chatti, I couldn’t wait to visit the famous hot springs of Yamunotri. After days of trekking in freezing temperatures, dipping my feet in the warm, mineral-rich waters was pure bliss. It was the perfect way to relax and soothe my tired muscles before the long drive back.
The 8-10 hour drive back to Dehradun was filled with memories of the adventure, new friendships, and a deep sense of fulfillment. As the mountains slowly disappeared into the distance, I knew this trek had left a lasting impact on me.
9. Essential Tips for Bali Pass Trek
- Start Physical Training Early – The trek is physically demanding, so train at least 2 months in advance with cardio, endurance exercises, and strength training.
- Pack the Right Gear – Trekking boots, warm layers, crampons, trekking poles, gloves, and a first aid kit are absolute essentials.
- Acclimatization is Key – Take it slow and stay hydrated to avoid altitude sickness.
- Hire an Experienced Guide – The trail is unmarked, and navigation is tricky, so having a local guide is a lifesaver.
- Leave No Trace – Respect nature, don’t litter, and carry all your waste back.
10. Conclusion: Would I Do It Again?
Absolutely! The Bali Pass Trek was one of the most challenging, rewarding, and transformative experiences of my life. It pushed my limits, rewarded me with breathtaking views, and taught me patience, resilience, and appreciation for nature.
If you love high-altitude trekking, adventure, and untouched natural beauty, this trek is a must-do. It will challenge you, but in return, it will give you an experience like no other.